Table of Contents
- Why Biblical History Matters for Family Heritage
- 1. Teach Biblical History Through a Family Timeline
- Making a Wall Timeline Together
- Timeline Activities That Stick
- 2. Read Aloud from Scripture and Ancient Texts
- 3. Best Practices for Scripture-Centred Learning at Home
- Setting a Consistent Rhythm
- 4. How to Explain the Book of Enoch to Kids
- The Astronomical Book and the 364-Day Calendar
- 5. Observe the Sky and the Seasons Together
- 6. Use Maps and Hands-On Objects to Teach Biblical History
- 7. Let Children Retell the Story in Their Own Words
Why Biblical History Matters for Family Heritage
Biblical history is the record of God’s dealings with people across time, told through Scripture and the ancient texts that grew alongside it. Teaching it at home gives children something sturdier than facts: a sense of belonging to a long story.
Solar-observation safety: Never look directly at the Sun. Observe changing light and horizon positions indirectly, or use properly certified solar-viewing equipment and competent guidance.
Many families find that this work deepens their own faith too. The Enoch Clock was built around exactly this idea, that ancient time and ancient words are worth passing on.
Children who learn biblical history gain three things:
- A timeline they can picture, not just names to memorise
- Language for talking about God’s faithfulness across generations
- A habit of asking what a text says before deciding what it means
That last point matters most. A common mistake is teaching conclusions before children have met the evidence.
1. Teach Biblical History Through a Family Timeline
A family timeline is the single most useful tool for teaching biblical history to kids. It turns scattered stories into one continuous line they can see.
Start with a strip of paper or a length of wall. Mark a few broad periods: the patriarchs, the exodus, the kings, the exile, the return, and the early church. Leave wide gaps. Children fill them in over months, not one afternoon.
Making a Wall Timeline Together
Let the children do the cutting and pasting. A timeline they build is a timeline they remember.
- Use one colour for people, another for places, a third for events
- Add a small drawing or sticker for each entry
- Write dates in pencil so you can adjust them later
Timeline Activities That Stick
Timelines work best when they are handled, not just looked at.
- Walk the line: have a child stand at a period and tell one story from it
- Add a card: each week, place one new person or event on the line
- Compare lengths: show how much time passes between Abraham and Moses
2. Read Aloud from Scripture and Ancient Texts
Reading aloud is still the most effective way to teach biblical history, because children hear the words rather than only seeing them.
Read a passage, then stop. Ask what happened. Ask what it felt like. Only then explain.
Ancient texts beyond the Bible can widen the picture. The Dead Sea Scrolls, found at Qumran, include copies of Scripture and other writings that show how some communities read and kept these texts (The Dead Sea Scrolls). Dead Sea Scrolls overview and scholarly resources
Keep sessions short. Ten focused minutes beats an hour of drifting attention.
3. Best Practices for Scripture-Centred Learning at Home
Scripture-centred learning means the text leads the lesson, not the other way around.
The best practices below come from ordinary households rather than formal classrooms.
- Read the passage before you explain it
- Ask questions before giving answers
- Keep one notebook for questions you cannot answer yet
- Let children see you reading for yourself
- Return to the same passages yearly
Setting a Consistent Rhythm
Rhythm matters more than length. A short reading at the same time each day or week builds expectation.
Many families tie readings to the week’s shape: a longer passage on the day of rest, a short one on busy evenings. The pattern does the teaching.
4. How to Explain the Book of Enoch to Kids
The Book of Enoch is an ancient Jewish text, not part of most Bibles, that describes visions, angels, and a solar calendar. It survives mainly in Ethiopic manuscripts, and portions were found among the Dead Sea Scrolls.
For children, the simplest honest framing is this: it is an old book that some ancient communities kept and copied, and it is not in most Bibles today.
Keep the explanation short and concrete:
- It is old, older than many things we own
- It was copied by hand, not printed
- Some parts of it appear among the Dead Sea Scrolls
- It is not Scripture for most churches, but it is worth knowing about
The Astronomical Book and the 364-Day Calendar
Within the Book of Enoch, chapters 72 to 82 are known as the Astronomical Book, sometimes called the Book of Luminaries. This section describes the sun, moon, and stars and sets out a 364-day year divided into four equal quarters.
That structure is what makes it teachable. Four seasons of thirteen weeks each. Children can count it on their fingers.
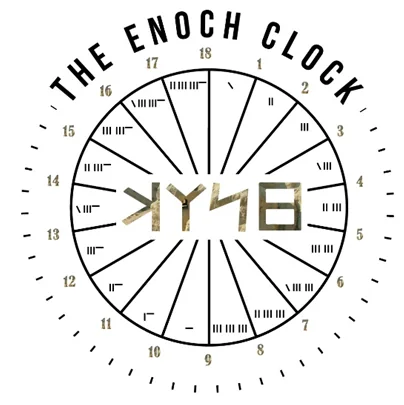
The Enoch Clock takes this ancient solar calendar as its starting point and makes the changing balance of daylight and darkness visible on a dial, so the pattern can be seen rather than only read about.
5. Observe the Sky and the Seasons Together
Sky watching turns an abstract calendar into something a child can check with their own eyes.
Go outside at the same time each week. Note where the sun sets. Note how the light changes.
Simple observations to record:
- Where the sun rises and sets along the horizon
- How long the daylight lasts
- When the first stars appear
- How the shadows change through the year
These notes build the same habit of attention the ancient texts assume. The Astronomical Book describes the sun’s path through fixed gates; a child watching the sunset move along the horizon is seeing the same thing the text describes.
6. Use Maps and Hands-On Objects to Teach Biblical History
Maps and objects anchor stories in place and matter. A story set “somewhere” is forgettable; a story set on a map is not.
What works well:
- A simple map of the ancient Near East, kept on the wall
- Small figures or stones to mark journeys
- A clay lamp, a piece of rough cloth, a wooden bowl
- A model of a small house or a well
Let children move figures along the map as you read. Abram’s journey becomes a line they drew themselves.
7. Let Children Retell the Story in Their Own Words
Retelling is where learning settles. A child who can tell the story has understood it.
Ask for the story back, not the lesson. Let them get details wrong at first.
Ways to encourage retelling:
- Ask for the story at bedtime, in their words
- Let them draw one scene and explain it
- Have an older child tell a younger one
- Record it and listen back together
Correct gently and only where it matters. The shape of the story is what you are building.
| Method | Time Needed | Best Age | What It Builds |
|---|---|---|---|
| Family timeline | 15 min weekly | 6-12 | Sequence and context |
| Read aloud | 10 min daily | 4+ | Familiarity with the text |
| Sky watching | 10 min weekly | 7+ | Attention to the calendar |
| Maps and objects | 20 min weekly | 5-11 | Place and setting |
| Retelling | 5 min nightly | 4+ | Understanding and memory |
Taken together, these seven approaches cover the same ground from different angles, which is how children actually hold onto history.